Step-by-Step Guide for Integrating ProxyJet Proxies in Switchy Omega
What is SwitchyOmega ?
SwitchyOmega is a popular browser extension designed to manage and switch between multiple proxy servers efficiently. It is especially useful for users who need to switch proxies frequently, such as for web scraping, managing multiple social media accounts, or browsing with enhanced privacy. SwitchyOmega simplifies the process of proxy management by providing an easy-to-use interface that works seamlessly with Chrome and Firefox browsers.
Use Case for ProxyJet Integration
Integrating ProxyJet with SwitchyOmega allows users to leverage high-quality residential and ISP proxies, which enhances online anonymity, reduces the risk of IP bans, and ensures smooth browsing or scraping activities. This integration is particularly beneficial for digital marketers, researchers, and businesses that need to access geo-restricted content or manage multiple online accounts securely.
Understanding ProxyJet Proxy Format
ProxyJet uses a detailed format to include specific information about the proxy, such as its type, region, and city. The format looks like this:
 ProxyJet detailed format
For example:
 example
In this format:
- USERNAME: This unique identifier includes the proxy type (resi for residential), region, country (US), state (Arizona), and city (Phoenix).
- PASSWORD: This is your secure password for authentication.
- IP: This is the domain of ProxyJet.
- PORT: This is the port number to connect to the proxy. Use 1010 for HTTP proxies and 2020 for SOCKS5 proxies.
Generating Proxy in ProxyJet Dashboard
- Sign Up: Go to ProxyJet and click on "Sign Up" or "Sign Up with Google".
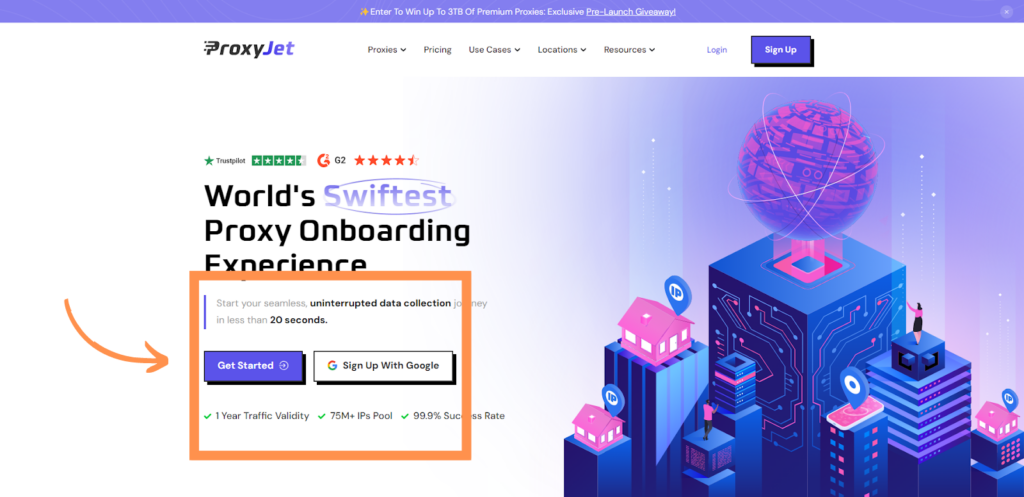 sign up
2. Create Account: If you don't use Google sign-up, please make sure you verify your email.
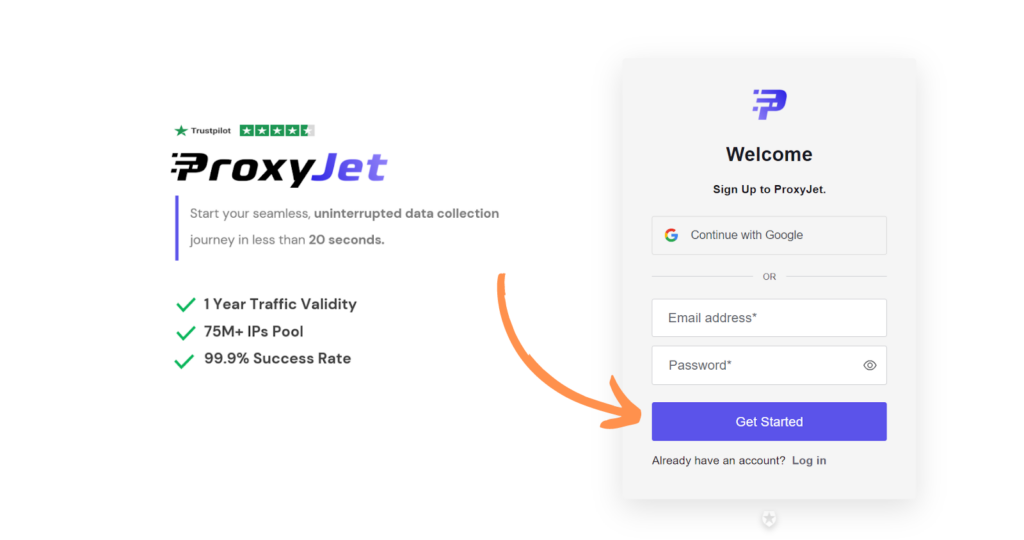 create account
 3. Complete Profile: Fill in your profile details.
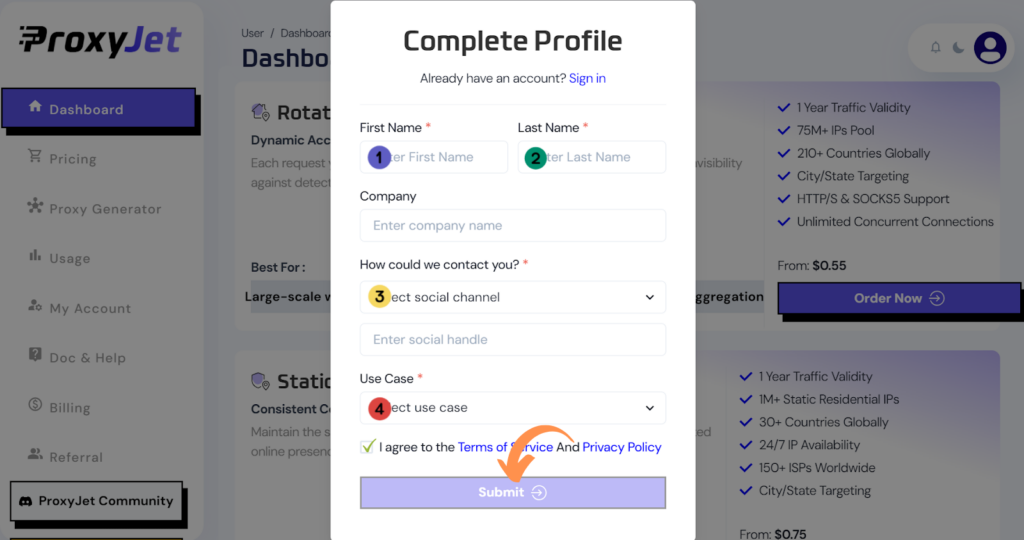
4. Pick a Proxy Type: Choose the type of proxy you need and click "Order Now".
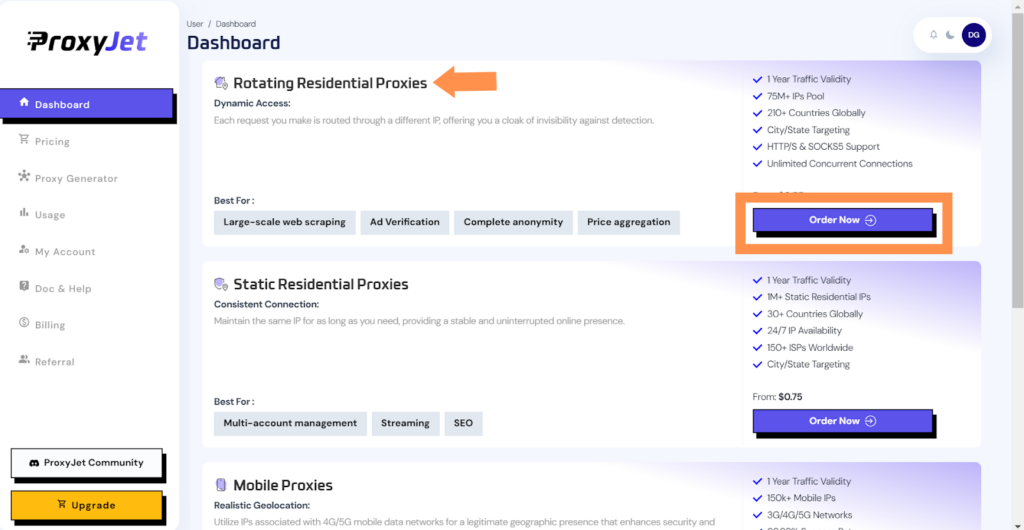
5. Pick Your Bandwidth: Select the bandwidth you need and click "Buy".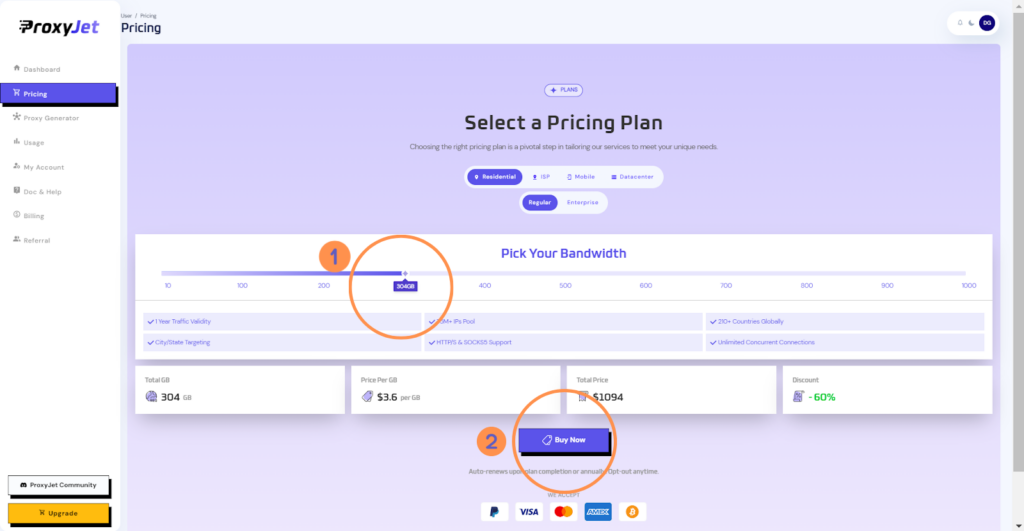
6. Complete the Payment: Proceed with the payment process.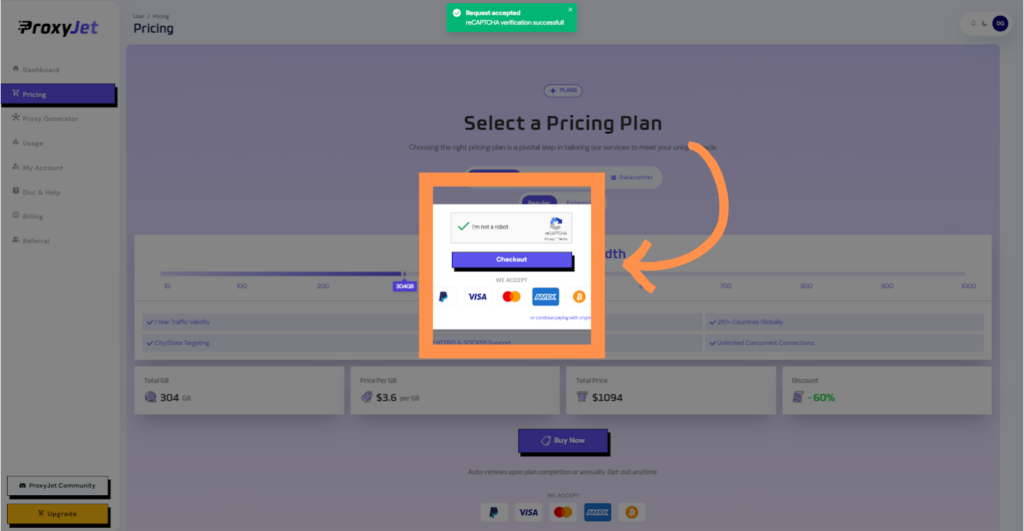
7. Access the Dashboard: After payment, you will be redirected to the main dashboard where you will see your active plan. Click on "Proxy Generator".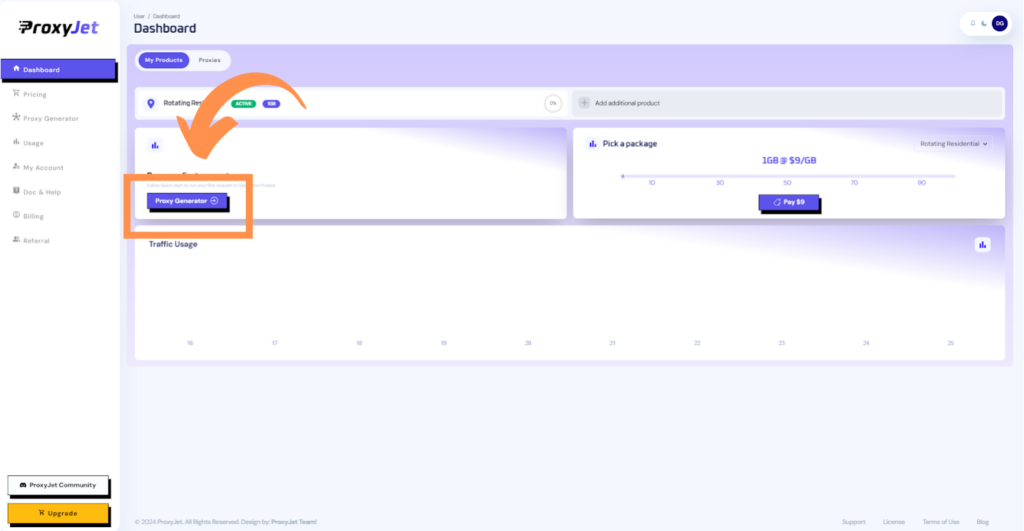
8. Switch Proxy Format: Click the toggle on the right top side of the screen that switches the proxy format to Username:Password@IP:Port.
9. Generate Proxy String: Select the proxy properties you need and click on the "+" button to generate the proxy string. You will get a string that looks something like this:
10. Great Job!: You have successfully generated your proxy!
Setting Up ProxyJet Proxies in SwitchyOmega
Step 1: Install SwitchyOmega Extension
- Install the Extension:
- For Chrome: Go to the Chrome Web Store, search for "SwitchyOmega," and click "Add to Chrome."

- For Firefox: Go to the Firefox Add-ons Store, search for "SwitchyOmega," and click "Add to Firefox."
- Launch SwitchyOmega:
- Once installed, you will see the SwitchyOmega icon in your browser's toolbar. Click on it to begin configuration.

Step 2: Configure Proxy Settings
- Open the SwitchyOmega Dashboard:
- Click on the SwitchyOmega icon in your browser toolbar.
- From the dropdown menu, select "Options" to access the SwitchyOmega dashboard.
- Create a New Profile:

- In the dashboard, click "New Profile."Name your profile (e.g., "ProxyJet Residential") and select the proxy type (HTTP, HTTPS, or SOCKS5) that corresponds to your ProxyJet setup.Enter the ProxyJet proxy details:
- Proxy Host:
proxy-jet.io - Proxy Port:
1010for HTTP/HTTPS or2020for SOCKS5. - Proxy User:
A1B2C3D4E5-resi_region-US_Arizona_Phoenix - Proxy Password:
F6G7H8I9J0
3. Save and Apply:
- Click "Save Changes" to save your proxy settings.

- Apply the profile by selecting it from the SwitchyOmega dropdown menu.

Step 3: Enable and Test the Proxy
- Enable the Profile:
- Open a new browser tab, click on the SwitchyOmega icon, and select the profile you just created.

- Test the Proxy:
- Visit a site like whatismyip.com to confirm that your IP address reflects the ProxyJet proxy.
Conclusion
By following these steps, you can integrate ProxyJet proxies with SwitchyOmega to enhance your online privacy and manage multiple proxies efficiently. This integration is ideal for users who require flexible proxy management across various online activities, ensuring a smooth and secure browsing experience.